Photo restyle AI: relight phone photos for social posts
Learn how photo restyle AI relighting fixes flat phone photos, creates golden-hour or studio moods, and refreshes evergreen assets without reshoots.
<!-- KEYTAKEAWAYS -->- Relighting often beats a reshoot when you need fast variants from a single photo.- Good source files (low noise, correct exposure) make relighting look natural.- Use presets + small intensity edits rather than extreme changes for consistent results.- A/B test relit variants to learn what lighting drives engagement for your audience.<!-- /KEYTAKEAWAYS --> You have a stack of usable phone photos that look flat, too bright, or wrong for your current campaign — but you don't have time or budget to reshoot. This article shows how to use photo restyle AI relighting to change mood, fix lighting, and refresh evergreen images fast, so you can publish new variants from the same source file.
I'll explain when to relight vs. reshoot, what modern relighting does (and why it sometimes breaks), a preflight checklist that improves results, and a practical GoCrazyAI workflow to turn a daytime phone shot into a convincing golden‑hour social post in minutes.
Quick Answer
How do you use photo restyle AI to relight phone photos? Use an AI relight tool to change light direction, temperature, and shadowing with presets (golden hour, studio, neon). Prepare the file with light noise reduction and exposure fixes, pick a preset or prompt, tweak intensity, and export variants for A/B testing.
Why relighting beats a reshoot: when should I relight vs reshoot?
Relighting often beats a reshoot when time, budget, or logistics block new photography and you only need a mood or lighting swap. Use relighting when the subject, composition, and pose are fine but the lighting is flat, harsh, or mismatched to your campaign. Relighting can also extend the life of evergreen assets by creating multiple mood variants (studio, golden hour, neon) from one shot.
Relighting is not a substitute for a reshoot when you need different camera angles, new props, or changed subject placement. If the photo is severely underexposed, blurred, or contains motion artifacts, a reshoot usually produces better results. In most marketing use cases — social posts, product thumbnails, and ad creatives — relighting saves time and budget while producing publish-ready variants.
Tip: If you plan a campaign with multiple formats, relighting a strong single image to create variants is often cheaper and faster than coordinating a new shoot for each version.
How does modern AI relighting work?
Modern AI relighting usually works by estimating scene geometry or depth, then using learned models to predict how light interacts with surfaces. Techniques range from depth‑guided networks and diffusion models to NeRF-style methods; recent academic work like Lite2Relight and IllumiNeRF shows how 3D-aware approaches preserve subject detail while changing illumination[[1]](#source-1)[[2]](#source-2).
Practically, most consumer tools rely on learned imitation rather than full physical light simulation. That means presets (Golden Hour, Studio, Cyberpunk) reproduce plausible light direction, color temperature, and rim lighting, but may fail on tricky reflective surfaces or extreme shadows. CreativeBloq notes that "Most AI lighting tools work by imitation… Until you push it, relighting is usually where things fall apart," which explains why subtle adjustments and good source images improve outcomes[[3]](#source-3).
Because of this, expect good results for mood changes and moderate directional shifts, and plan for manual cleanup when bright highlights, reflections, or very dark shadows are involved.

What photos need preparation before relighting? — a preflight checklist
Prepare photos before relighting to reduce artifacts and improve realism. Key preflight steps usually include noise reduction, minor exposure correction, subject separation/selection, and cropping for the final format. These steps reduce amplified noise in dark areas and help the model preserve skin tones and texture.
Checklist:
- Remove heavy noise and sharpen slightly for soft smartphone shots.
- Correct extreme exposure/white balance so the algorithm has a neutral starting point.
- Do a quick subject mask or local selection if the tool supports it (keeps subject edges sharp).
- Remove tiny distractions (sensor dust, stray wires) if they'll catch new highlights.
- Export at original resolution; many relighting tools output at the input resolution for best results.
Practical note: documentation from tools and academic guidance recommend cleaning underexposed or noisy images before heavy relighting to avoid the model amplifying artifacts. If you're planning dramatic lighting changes (neon gels, colored rim lights), add the subject mask step so the relighter preserves skin detail and avoids flattened tones.
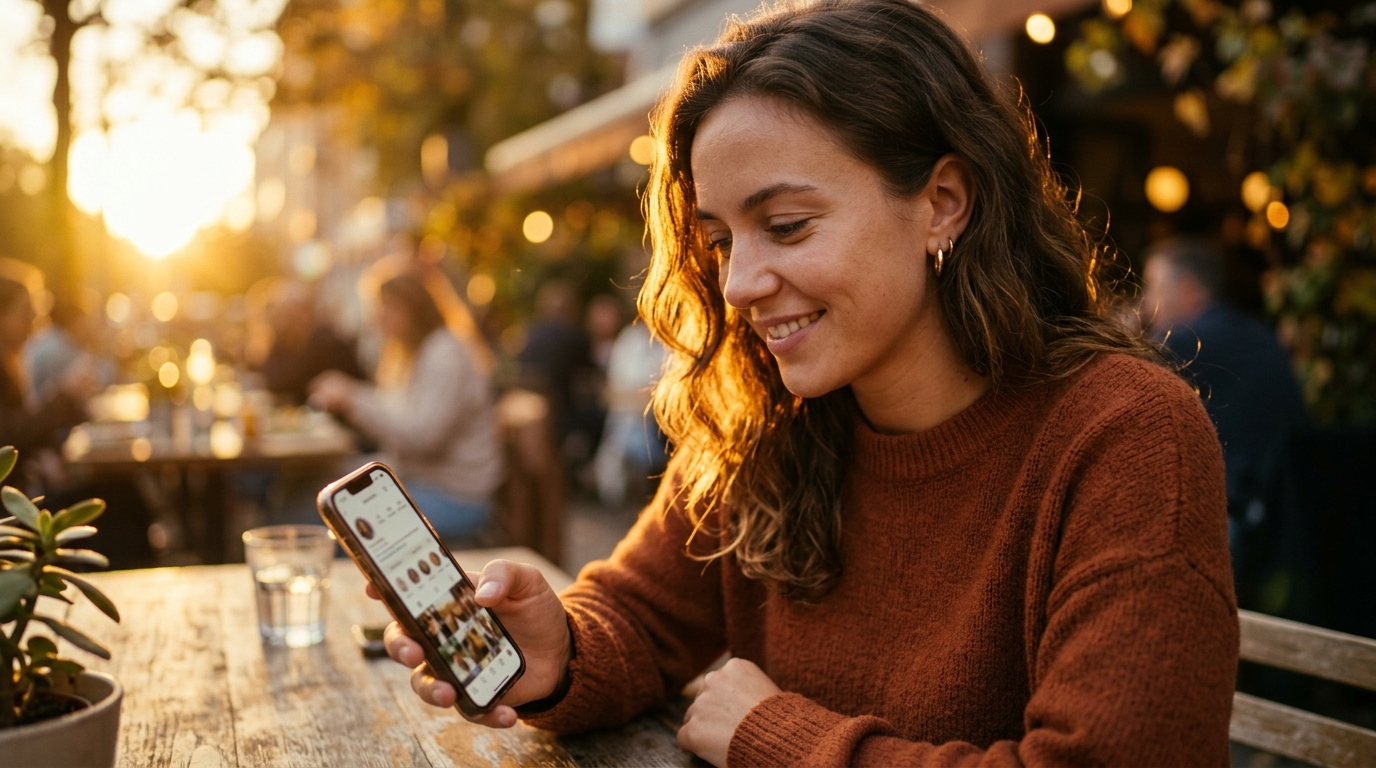
How do I convert a daytime phone shot into golden hour with GoCrazyAI?
You can convert a daytime phone shot into a golden‑hour look on GoCrazyAI by choosing the Golden Hour preset, optionally masking the subject, and dialing intensity to taste. GoCrazyAI AI Image Relighting preserves subject and composition and outputs at the original resolution, so you get a publish-ready file quickly.
Step-by-step (summary): upload the photo, pick the Golden Hour preset, use the color‑temperature slider to warm or cool the cast, reduce intensity if the effect feels extreme, and export PNG/JPEG. If the tool allows local edits, add a subtle rim light or increase shadow warmth on the subject to sell the time‑of‑day.
For a quick start, try the Golden Hour preset on the GoCrazyAI AI Image Relighting page: AI Image Relighting. That page also lists other presets (Studio, Neon) so you can iterate fast.
Quick setup tip: If the sky in the original is blown out, crop tighter on the subject or use a gentle sky replacement before relighting to avoid unnatural haloing.
Related tools: when you're building social assets around the relit photo, you can generate companion imagery with the GoCrazyAI AI image generator or upscale the final export using the GoCrazyAI image upscaler.
What are examples of advanced edits combining relighting with cleanup and color grading?
Advanced edits combine relighting with cleanup, color grade, selective dodging/burning, and format-specific crops to make assets ready for feeds and ads. Typical sequences: reduce noise and exposure hotspots → relight with the chosen preset → local retouch (skin/reflective catch cleanup) → apply color grade → crop to aspect ratios.
Example workflows you can copy:
1) Social square product shot (studio look):
- Clean sensor dust, reduce noise.
- Apply Studio preset, lower intensity to 70%.
- Remove reflections on packaging using a small clone/patch.
- Apply a mild contrast + punchy midtones grade.
- Crop 1:1 for Instagram feed.
2) Portrait to golden hour (soft lifestyle):
- Correct exposure and remove clipped highlights.
- Mask subject hair edges if possible.
- Apply Golden Hour preset; warm temperature + small rim light.
- Use local dodge on eyes and subtle saturation on lips.
- Export 4:5 for Instagram stories or ads.
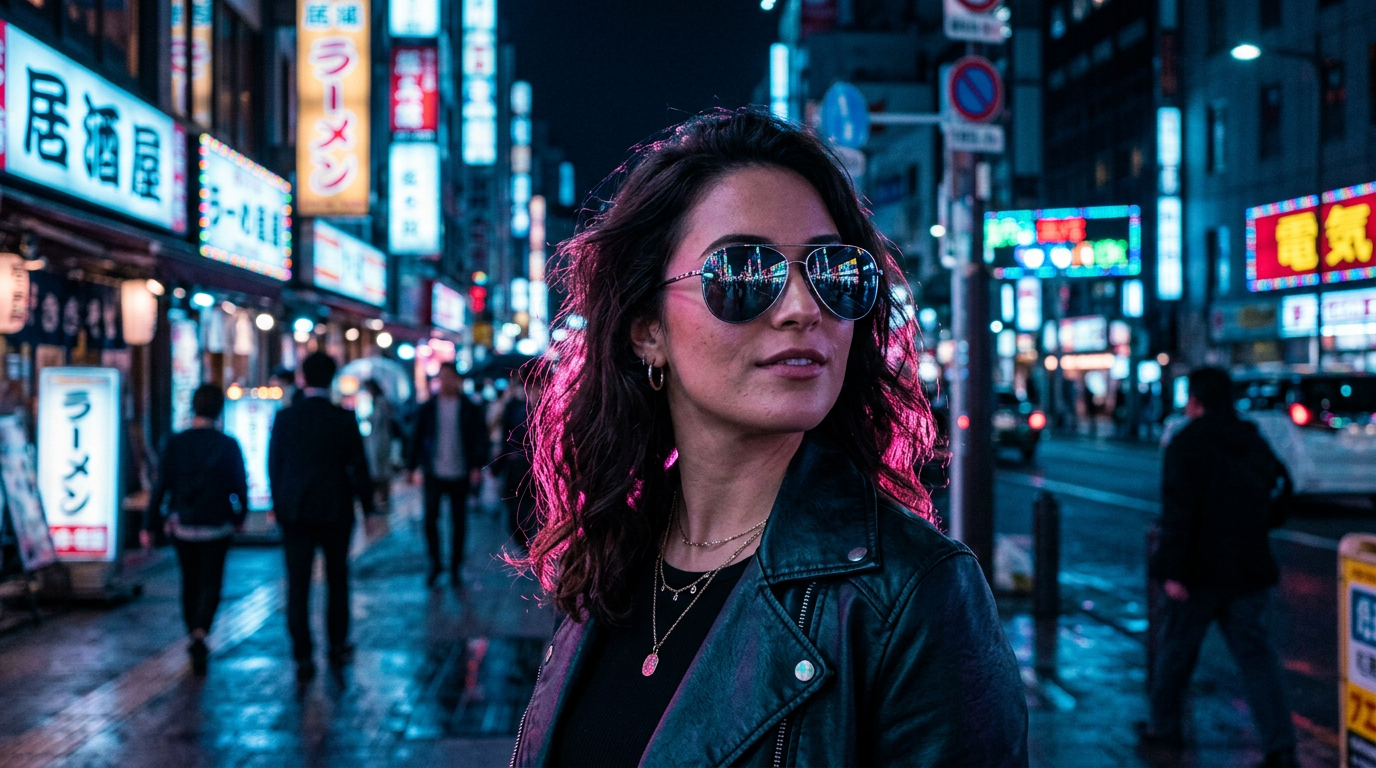
3) Neon product ad (dramatic):
- Reduce baseline noise aggressively.
- Apply Cyberpunk/Neon preset; set gel color to brand hue.
- Lower overall intensity, then paint a colored rim for the product.
- Sharpen texture selectively and export widescreen for video use.
These examples show how relighting pairs with cleanup and color grading to produce distinct variants from one original image. When you need higher resolution or cleaner details after these edits, use an image upscaler to sharpen exports without creating artifacts.
Pro prompt example (for text-promptable relighters):
"Golden hour, warm rim light from the left, soft shadows, skin tones preserved, subtle lens flare, intensity 0.6"
Use this prompt template and tweak color hex codes for brand matches; many tools let you pick color by hex or color picker for gels or rim lights.
How do I A/B test relit images for engagement and reuse across campaigns?
A/B testing relit images generally means creating small, controlled variants where only lighting or mood changes between the control and test. Publish variants to a similar audience slice and measure click-through, engagement, or conversion metrics over a short test window to learn which lighting drives performance.
Practical test design:
- Keep copy, CTA, and composition identical; only change lighting preset or intensity.
- Create at least two variants (e.g., Original vs Golden Hour) and run them in parallel for 24–72 hours.
- Track engagement metrics (CTR, likes, saves, conversions) and analyze which lighting yields higher performance for the creative goal.
- Reuse winners across other formats by exporting the relit version and cropping for different aspect ratios.
Because relighting can change perceived color and contrast, winners tend to differ by platform and audience — a warm Golden Hour may outperform on Instagram, while crisp Studio lighting can do better in product feeds. Use small tests to build a lighting playbook for your brand and rotate relit variants to extend asset lifespan without reshoots.

What common mistakes and pitfalls should I avoid when relighting photos?
Common mistakes include pushing relighting strength too far, skipping preprocessing, and ignoring reflective materials. Avoid these by working iteratively and combining relighting with cleanup and local retouch.
Common pitfalls and how to avoid them:
- Amplified noise in dark areas: reduce noise first; limit relight intensity on shadow fills.
- Mismatched casts on reflective surfaces (glasses, jewelry): mask reflections or do selective dodge/burn after relight.
- Flattened skin tones and loss of texture with extreme temperature shifts: lower effect strength and preserve midtone contrast.
- Haloing around backgrounds when changing sky or direction: crop tighter or separate sky before relighting.
- Using relighting when you need a new angle: choose a reshoot if composition or pose must change.
If you hit a failure mode, moderate the preset intensity or perform a secondary retouch step. Many tools produce the best results with subtlety — small directional shifts and warm/cool temperature tweaks usually read as natural, while extreme gels or heavy rim lights often require manual cleanup.
Frequently Asked Questions
Can I relight photos taken with any phone?
Yes, most phones work, but results are better with higher‑quality files: low noise, no heavy motion blur, and reasonable exposure. Clean noisy or underexposed images first for the best outcome.
Will relighting change the resolution or crop my photo?
Good relighting tools preserve the original resolution and composition; you can then crop for social formats. If you need larger exports, use an image upscaler after relighting.
Are presets or text prompts better for relighting?
Presets are faster and consistent; text prompts allow fine control (direction, gel color, intensity). Use presets to iterate quickly, then refine with prompts or sliders for brand matching.
How do I avoid weird color casts on reflective objects?
Either mask reflective areas before relighting, reduce relight intensity, or fix casts with local color correction after relighting. Minor manual retouching usually fixes these issues.
Conclusion
Relighting is a fast, cost-effective way to refresh old photos without reshoots when composition and subject are usable. Prepare files with noise reduction and exposure fixes, choose presets or prompts conservatively, and A/B test variants to learn what lighting performs for your audience. For a quick workflow that preserves subject and outputs at original resolution, try GoCrazyAI's AI Image Relighting to create golden‑hour, studio, or neon variants in minutes.
Sources
- How we taught AI to understand light (CreativeBloq, Mar 2026)creativebloq.com ↗
- Relight Photo - AI Photo Lighting Editor (Veed)veed.io ↗
- Relight in Microsoft Photos: feature guide (Pureinfotech)pureinfotech.com ↗
- Relight documentation (Freepik/Relight tools)it.freepik.com ↗
- Lite2Relight: 3D‑aware Single Image Portrait Relighting (SIGGRAPH 2024)reality.cs.ucl.ac.uk ↗
- IllumiNeRF: 3D Relighting Without Inverse Rendering (arXiv, 2024)arxiv.org ↗
- AI Photo Relighting — practical tool example (Somake AI)somake.ai ↗