Image upscaler 4K tutorial: practical steps to improve thumbnails and print assets
Step-by-step image upscaler 4K tutorial for creators: convert phone photos or AI art into crisp 4K/8K thumbnails and print-ready posters with practical settings and examples.
<!-- KEYTAKEAWAYS -->- Choose target pixels based on final DPI and physical size, not camera megapixels.- Denoise and repair before strong upscaling for best results.- Use 2×/4×/8× SR factors to reach 4K/8K; avoid forcing native ultra-high-res generation.- Check results at actual display/print size and keep color profile in mind.<!-- /KEYTAKEAWAYS --> You need a crisp 4K thumbnail or a print-ready poster from a low-res phone shot or AI image right now. This guide gives clear, repeatable steps: how to pick the right target pixels and DPI, denoise and repair, apply the correct upscaling factor, and finish with sharpening and color checks. It includes copyable settings and prompt examples, plus a practical path to pull a watermark-free 4K/8K export with GoCrazyAI Image Upscaler.
Quick Answer
How do you use an image upscaler to get a 4K result? Pick a target pixel size (3840×2160 for 4K), denoise and repair visible artifacts, then run a 2×/4×/8× single-image super-resolution upscaler and finish with subtle sharpening and color-profile conversion. Test at your thumbnail or print size and iterate.
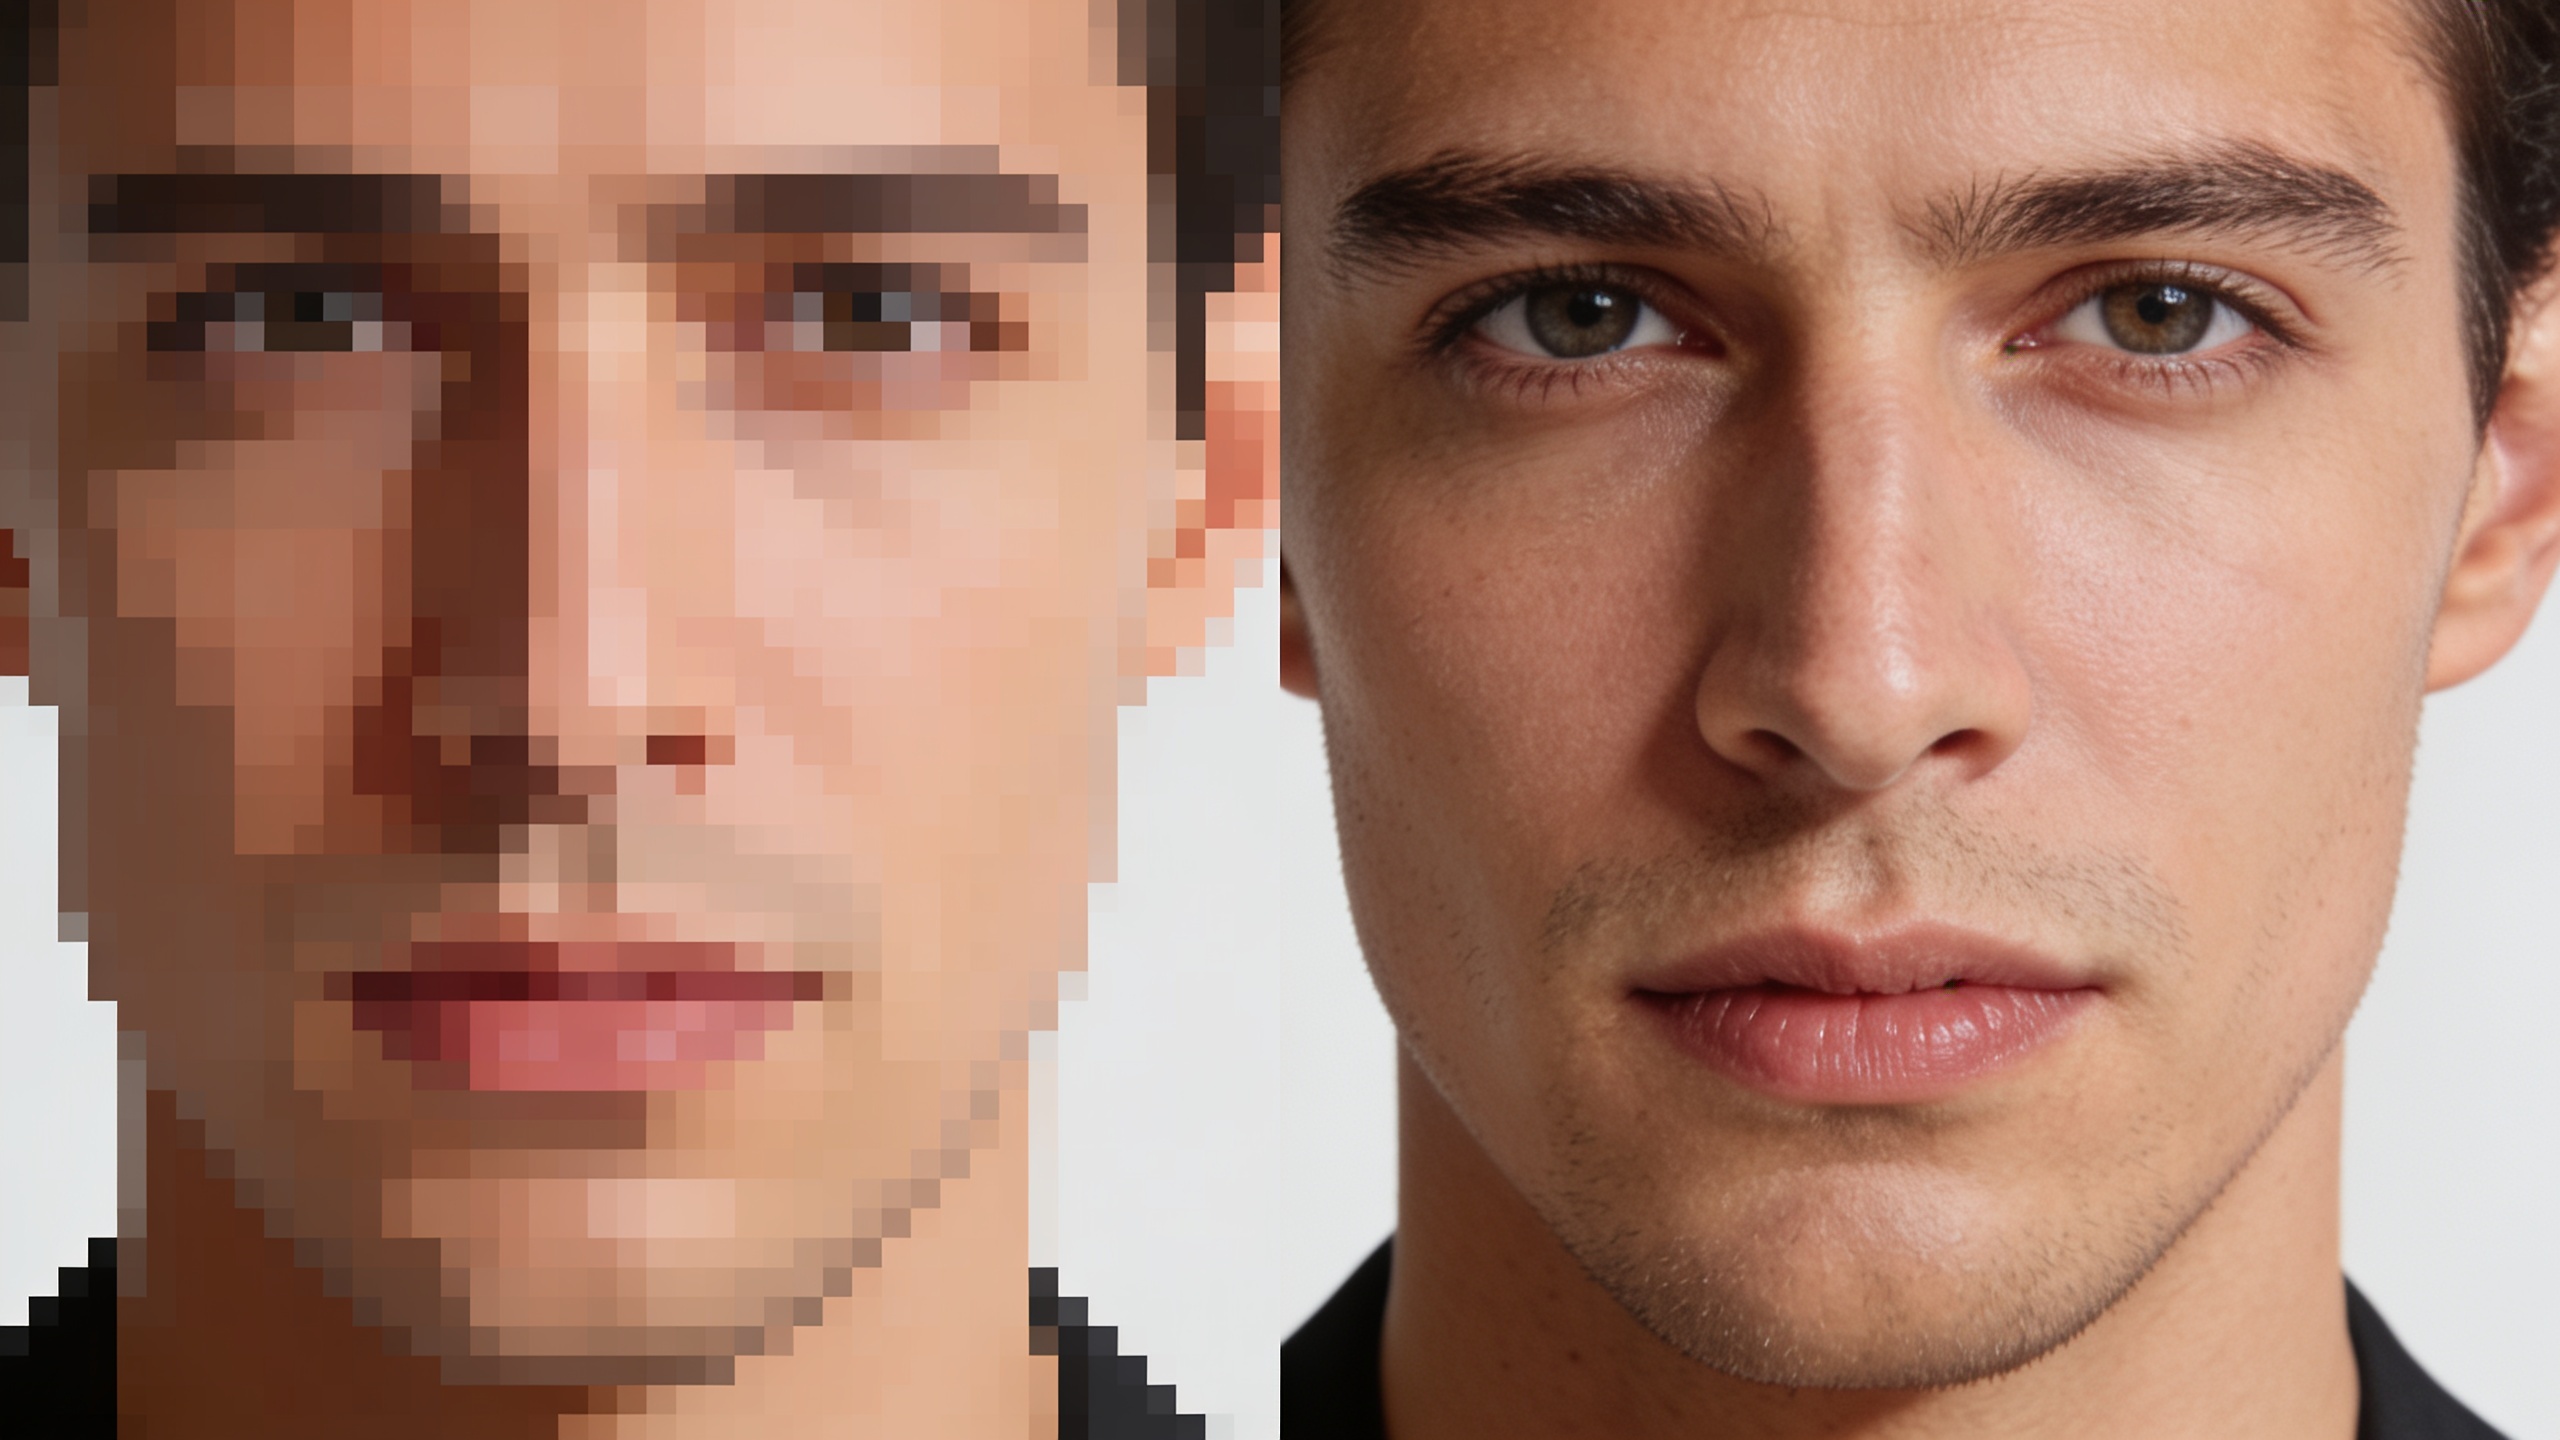
Why AI image upscaling matters in 2026: when and why to choose super-resolution?
AI image upscaling (single-image super-resolution) uses deep-learning models to infer and restore high-frequency detail that classical algorithms like bicubic interpolation cannot reconstruct reliably. In practice, SR generally produces images that look sharper and more detailed for thumbnails, social posts, and prints, especially when the source has compression artifacts or low-frequency blur. Recent reviews note SR's strong advantage for perceptual quality over interpolation[[1]](https://www.sciencedirect.com/science/article/pii/S1566253522001762). Use AI upscaling when you need to: 1) increase pixel count (e.g., phone photo to 4K), 2) recover detail from compressed AI outputs, or 3) prepare assets for printing at high DPI. It usually works best after cleaning noise and fixing artifacts—upscaling raw noisy images can amplify defects. For creators, the rule of thumb is: repair first, upscale second, then refine (sharpen/color) for target output.
Decide target use and print specs: calculating pixels, DPI, and safe enlargement for posters and prints?
Start by choosing the final use and the print/display specs; this determines the pixel target and the upscaling factor. For example, 4K (3840×2160) prints at ~300 DPI to about 12.8×7.2 inches—useful for small posters or high-quality prints. Many printers and galleries recommend 300 DPI for photo-quality prints, so a 16×20 inch poster needs ~4800×6000 px (16×300 = 4800, 20×300 = 6000). If your source is 1200×800, you need roughly 4× enlargement in each axis to reach 4800×3200 (or combine crop/recompose). For YouTube thumbnails, baseline web size is 1280×720; test smaller display sizes like 120×67 to ensure legibility after compression[[2]](https://www.capcut.com/resource/youtube-thumbnail-resolution). Practically pick an SR factor (2×, 4×, 8×) that gets you close to the pixel target without extreme extrapolation. When in doubt, aim for the model "sweet-spot": generate or edit at a moderate resolution, then apply SR—this often yields better composition and fewer generation artifacts than trying to natively render ultra-high-res[[3]](https://martini.art/en/how-to/upscale-images-to-4k).

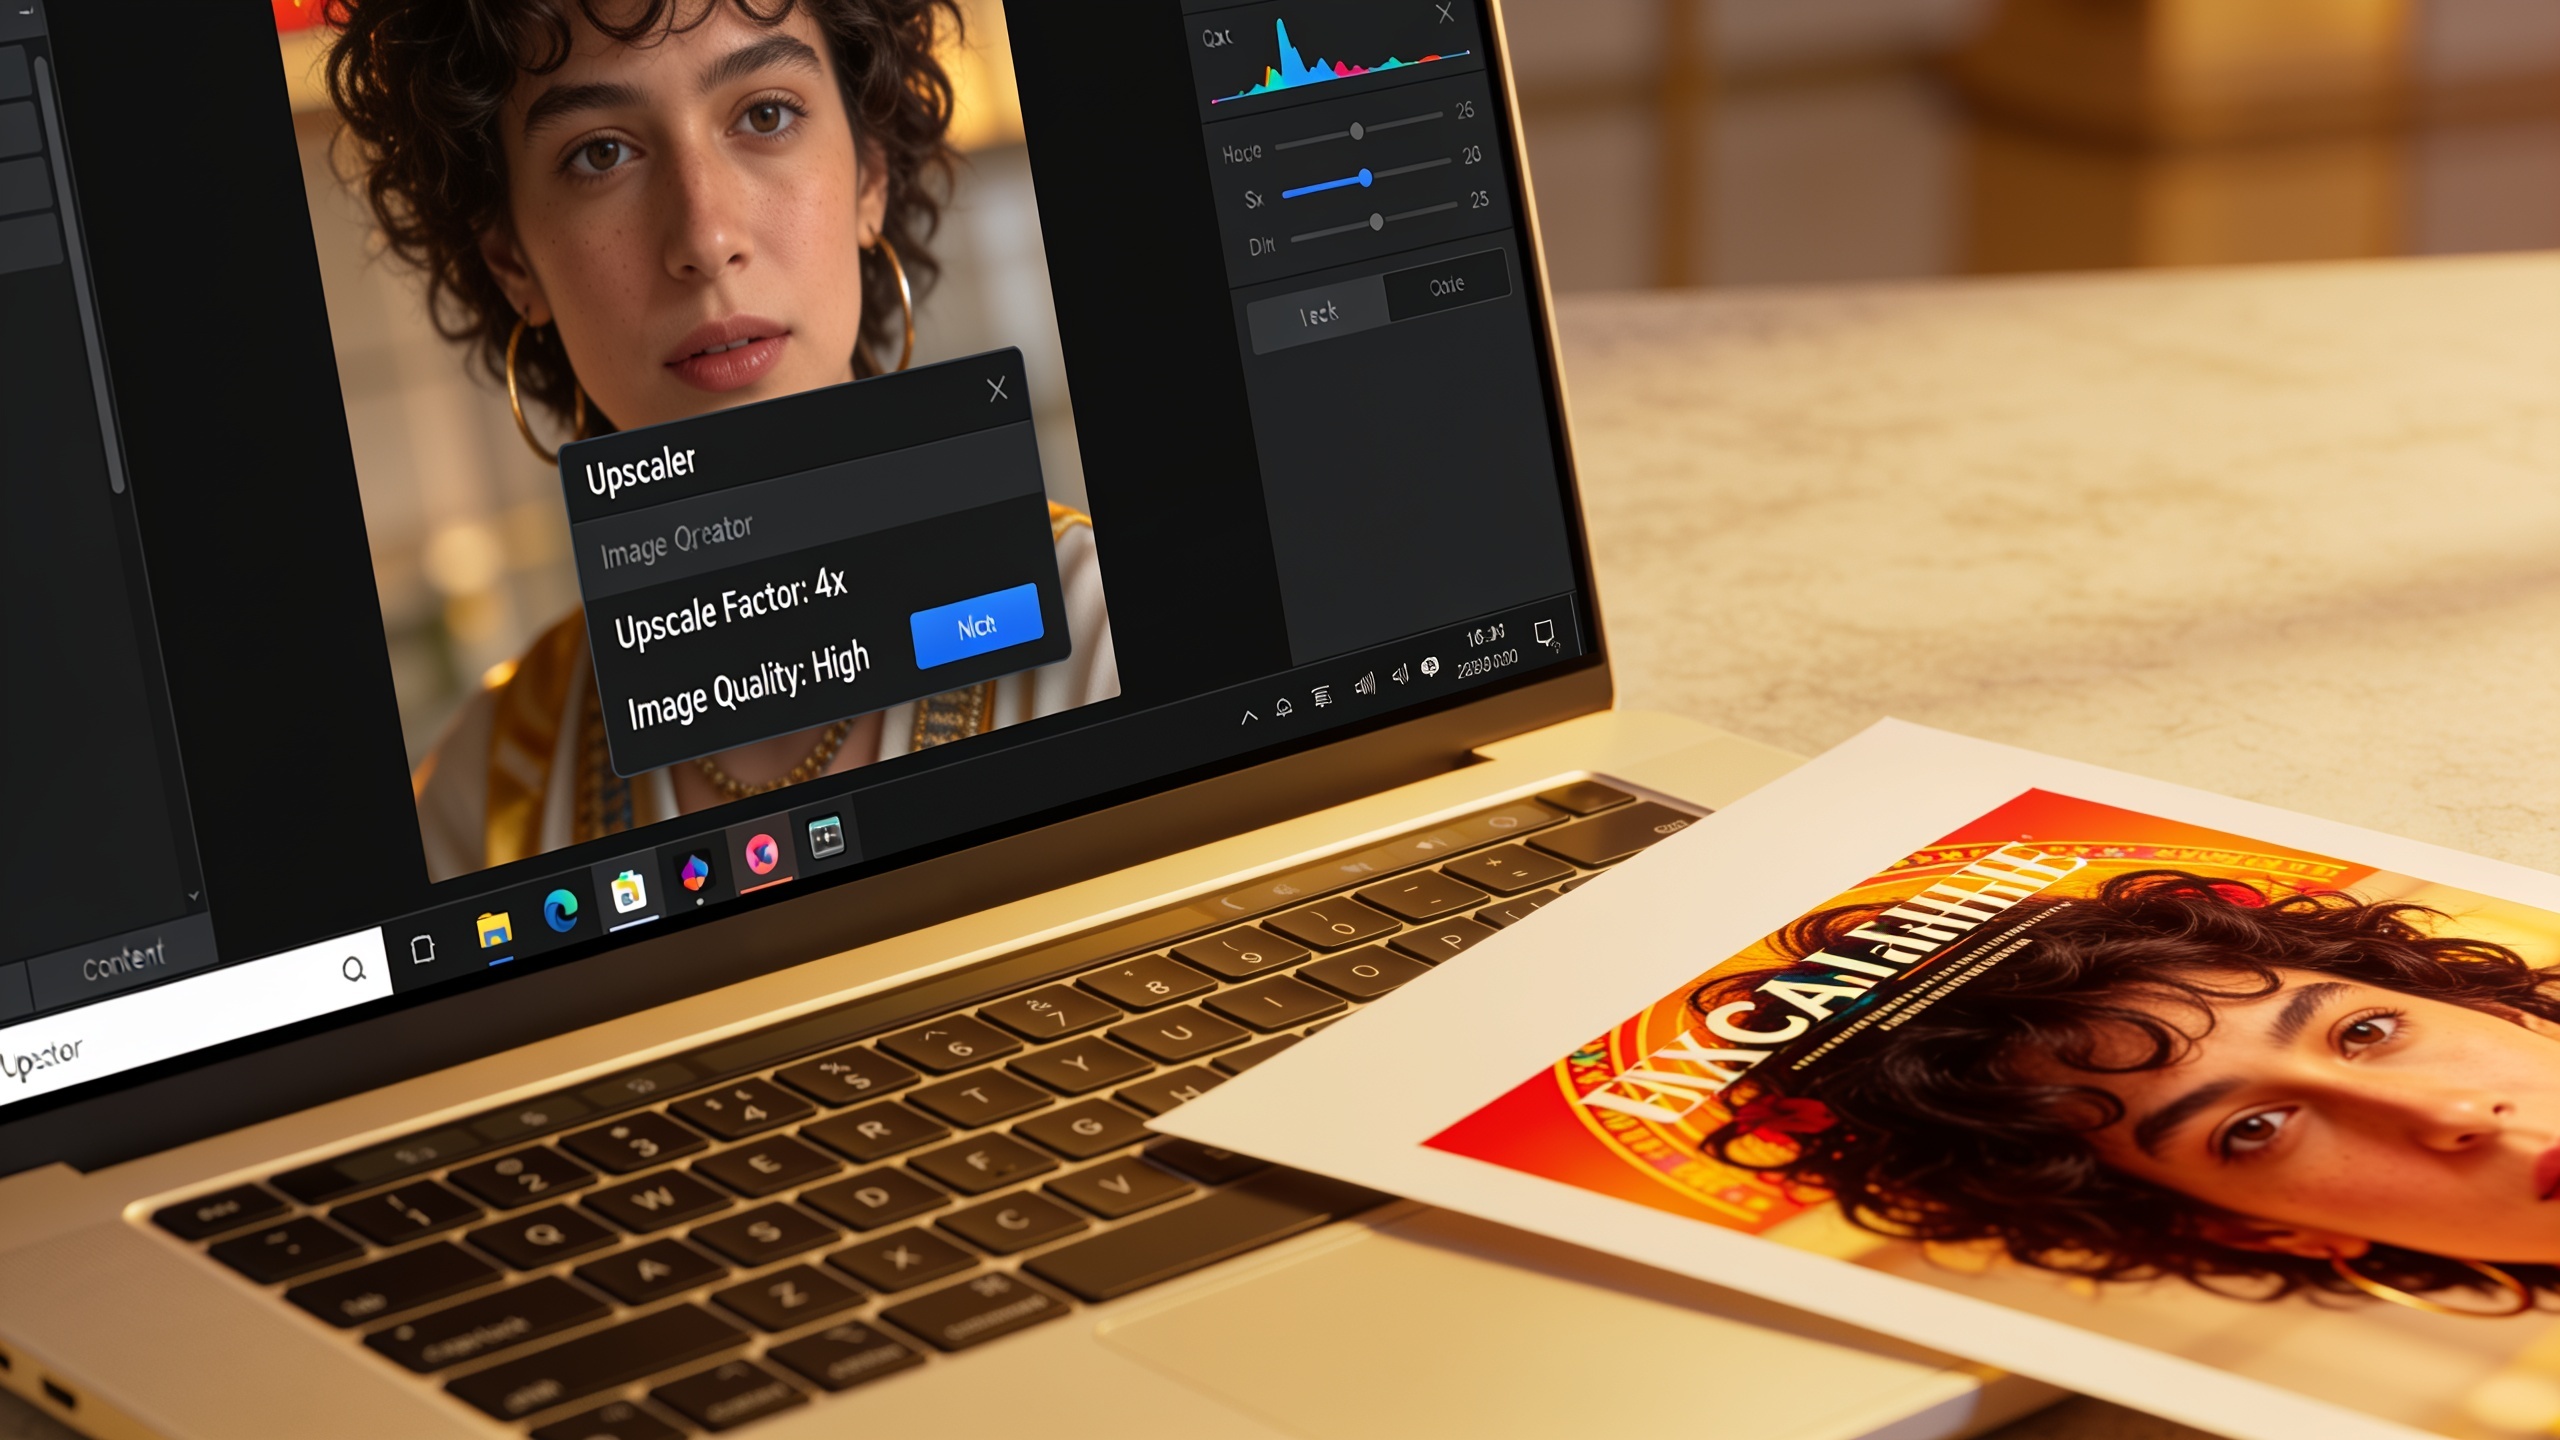
Example workflow: Hands-on upscale and sharpen an AI-generated thumbnail to 4K — step-by-step workflow you can copy?
Quick answer: Repair compression and small artifacts, upscale by 2× or 4× depending on starting size, apply subtle adaptive sharpening and check at thumbnail-size scales for legibility. Below is a copyable workflow with settings and prompts.
Step-by-step workflow you can copy:
1) Inspect the source. If your AI image is 1024×1024 and you need a 4K thumbnail, plan a 4× upscale (1024×4 = 4096px). If the source is 1280×720, plan 3× or combine crop+2×.
2) Pre-clean (repair and denoise).
- Run a light denoise (strength 10–20%) and a compression-artifact repair pass. If using manual tools, apply localized cleanup with healing/clone to remove glaring artifacts.
3) Upscale: choose factor and algorithm.
- Target: 3840×2160 (4K). Upscale 1024→4096 using a 4× SR model specialized for perceptual detail.
- If tool asks, pick "preserve details" or "photoreal" mode rather than "smooth".
4) Sharpen and micro-contrast.
- Use subtle unsharp mask: amount 40–80, radius 0.6–1.0 px for 4K images. Or use a model-aware sharpening toggle if available.
5) Resize canvas and check composition for text legibility.
- Downsample a copy to 1280×720 and 120×67 to verify readability under compression.
Copyable prompt examples for repair tools (where a tool accepts text guidance):
"Remove compression blocks and JPEG banding across sky; preserve edge detail on subject face. Mild denoise only."
"Sharpen text area without introducing halos; preserve skin tones and avoid increased grain."
Expected outputs per stage: a cleaned source image, a 4× upscaled 4K image, and a sharpened final exported in sRGB for web. Test final thumbnails after YouTube/host compression to confirm legibility. For detailed research background on why SR outperforms interpolation, see the review on SR techniques[[1]](https://www.sciencedirect.com/science/article/pii/S1566253522001762).
Hands-on: Turn a cropped phone photo into a print-ready poster (4K/8K) — settings, denoise, and color tips?
Quick answer: repair hot pixels and heavy noise first, choose an upscaling factor that reaches the pixel count for your print size, then convert to your printer's ICC profile after sharpening. For print, keep a copy in the working color space (Adobe RGB or sRGB depending on print lab) and only convert for final output.
Practical workflow:
1) Assess source and crop for composition. Keep the subject centered for posters and allow >15% bleed area.
2) Repair: apply targeted noise reduction (luminance first), remove hot pixels or compression blocks. If the phone RAW is noisy, use 25–50% denoise strength—enough to lower grain but not to smear detail.
3) Choose upscaling factor: if you need 4800×6000 (16×20@300DPI) and your phone photo is 1600×2000, you need roughly 3× in both axes. Use a combination of 2× then 1.5×, or a single 4× pass followed by careful crop to avoid interpolation artifacts.
4) Sharpening: for prints, use slightly stronger output sharpening than for web. Apply radius 0.8–1.2 px with amount 60–120 depending on image content. Preview at 100% and at print-scale zoom (100% equals print pixels).
5) Color and profile: work in a wide-gamut editing space; convert to the printer ICC profile at the last step. Soft-proof in your editor to check color shifts.
6) Export: TIFF or high-quality JPEG with minimal compression. For large prints consider up to 8K outputs if the print size exceeds typical poster dimensions—modern SR models target 4K+ restoration well[[4]](https://openaccess.thecvf.com/content/ICCV2021/papers/ZhangBenchmarkingUltra-High-DefinitionImageSuper-ResolutionICCV2021_paper.pdf).
Avoid common upscaling pitfalls and mistakes to avoid: artifacts, over-sharpening, aspect-ratio and color-profile fixes?
Quick answer: The top mistakes are upscaling noisy images without repair, over-sharpening which creates halos, and exporting in the wrong color profile. Avoid these by doing repair first, using conservative sharpening, and soft-proofing before final export.
Common mistakes and how to avoid them:
- Upscaling before denoising: SR will amplify noise. Run a light denoise/repair pass first.
- Over-sharpening for web: heavy unsharp mask creates halos and pixel soup when the final asset is recompressed. Use subtle amounts and test at final display sizes.
- Ignoring aspect ratio: stretching to fit a target without proper crop leads to distortion. Choose a scale factor that preserves aspect ratio and recomposite if necessary.
- Wrong color profile: exporting in a wide-gamut space while the printer expects sRGB or a specific ICC will shift hues. Soft-proof and convert at the end.
- Expecting miracles from a single pass: extreme enlargement from tiny sources often looks synthetic; consider recomposition, re-generation at larger base resolution (when possible), or stitching multiple images if detail is crucial.
Following the repair→upscale→sharpen→profile workflow prevents most common failures. If you see checkerboard or repeated textures after SR, try a different SR model or reduce the upscaling factor and perform a second pass of conservative scaling.
Why GoCrazyAI Image Upscaler is the practical choice: feature comparison, speed, and conversion path?
Quick answer: GoCrazyAI Image Upscaler exports watermark-free 4K/8K images, restores and sharpens detail, and cleans compression artifacts—making it a straightforward path for creators who need fast, usable outputs for thumbnails, posters, and ads. It supports up to 8K output and is tuned for both photo and AI-generated assets.
How it helps in a real workflow: upload your cleaned or original image, pick a 2×/4×/8× upscaling factor, choose a mode focused on detail restoration (photoreal) or gentle smoothing for illustrations, then export in sRGB or TIFF for print. GoCrazyAI's Image Upscaler is designed to avoid watermarks on exports so you can pull production files immediately. For creators who generate images on the platform, the upscaler pairs well with the AI image generator to generate at mid resolutions and upscale instead of forcing native 4K. Learn more or try it now on the GoCrazyAI Image Upscaler page: GoCrazyAI Image Upscaler.
Supporting tools across GoCrazyAI that help the pipeline: use the AI Image Generator to create or re-render source images at a model sweet-spot resolution before upscaling (/ai-image-generator). Check pricing and credits if you plan batch processing or many hires (/credits).
Frequently Asked Questions
What upscaling factor should I use to reach 4K from a 1024px source?
From 1024px use a 4× upscale to reach ~4096px on that axis. If you need exactly 3840px, upscale to 4096 and crop slightly, or use a 3.75× pipeline (2× then a 1.875× resample) if your tool supports fractional scaling.
Can I upscale images for print without losing color accuracy?
Yes—work in a wide-gamut editing space, denoise and upscale, then soft-proof and convert to the printer's ICC profile at the last step. Export as TIFF or high-quality JPEG for print.
Will AI upscaling remove JPEG compression artifacts?
Modern SR models can reduce compression artifacts, but best results come when you run a dedicated artifact-removal/repair step before strong upscaling to avoid amplifying remaining blocks.
Conclusion
Final thoughts: For thumbnails or posters, treat upscaling as part of a pipeline: repair, upscale, sharpen, then profile and test at final size. Use conservative sharpening and check legibility at the smallest expected display. If you want a fast, watermark-free route to crisp 4K or 8K exports, try GoCrazyAI Image Upscaler for a practical, production-ready conversion path: GoCrazyAI Image Upscaler.
Sources
- Image super-resolution: A comprehensive review, recent trends, challenges and applications (ScienceDirect)sciencedirect.com ↗
- How to Upscale Images to 4K with AI (martini.art)martini.art ↗
- How to Upscale Images for Printing: Complete Guide (UpscalePro)upscalepro.ai ↗
- Upscale AI Images for Print: Resolution & DPI Guide (Arteza)arteza.ai ↗
- YouTube Thumbnail Resolution: Ideal Size Guide (CapCut Resource)capcut.com ↗
- Noise Reduction Techniques for AI-Generated Thumbnails (ThumbnailCreator)thumbnailcreator.com ↗
- Benchmarking Ultra-High-Definition Image Super-Resolution (ICCV/UHDSR4K)openaccess.thecvf.com ↗
- 4KAgent: Agentic Any Image to 4K Super-Resolution (OpenReview)openreview.net ↗
- How to Upscale for Print - Step-by-Step Guide (ImageUpscaler.world)imageupscaler.world ↗